On a sunny day, it’s natural for most photographers to head out into the countryside. A short drive can get you to a beautiful stretch of coastline or a sweeping landscape here in the UK. However, in your rush, you probably passed another location bursting with photographic potential: the urban landscape.
Urban photography, available in every other town and city in the country, is a fabulous exercise, no matter how boring or dull it may seem at first.
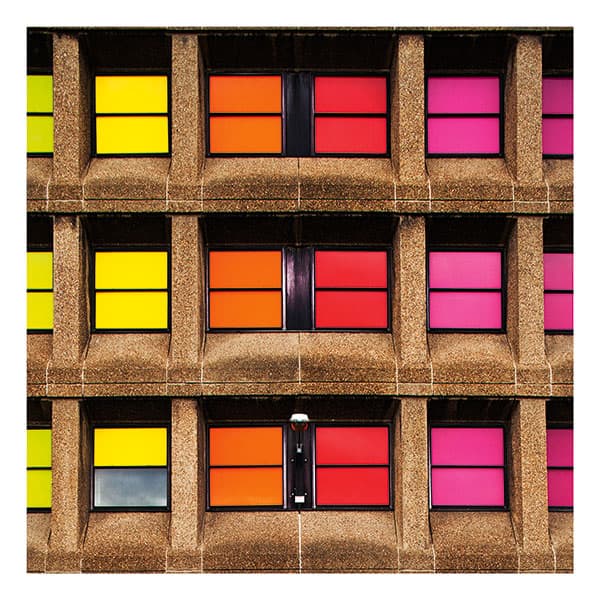
All towns have a mixture of old and new architecture, both of which are worthy subjects. At first glance, you might think of a newly built office block as a monstrosity, but look more closely and you will see it is a work of art, designed by architects with an acute eye for detail. You can either visit a town early on a Sunday morning and have the place to yourself, or try going to the same location first thing on a Monday morning and be confronted with a busy, bustling environment that is full of life and drama.
Our city streets are exciting places. They constantly change with the direction of light, the people who pass through them and the contrasts between all the buildings. There are new views everywhere, from wideangle vistas to interesting abstracts. There’s noise and chaos, yet calm contemplation at the turn of a corner. From busy high streets to peaceful green spaces, the urban landscape offers every opportunity a photographer could hope for.
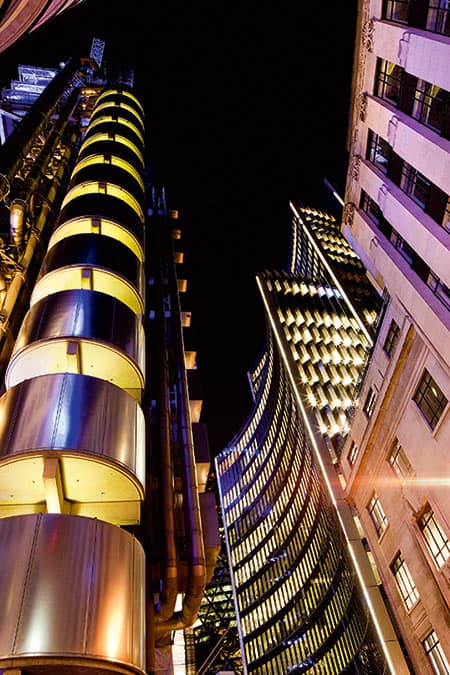
1. Work with the architectural style
As with this shot of La Défense, Paris, look up and exaggerate futuristic lines of modern buildings (Canon EOS 5D Mark II, 28mm, 1/90sec at f/8, ISO 200)
From modern skyscrapers to old churches, sleek shopping centres to derelict Victorian originals, every town and city has its own mix of architecture, each of which must be approached in its own way. The sleek and often futuristic lines of modern structures are open to more creative ways of capturing them. Shoot these with a wideangle lens and make the most of any distortion created for impact. They can also be captured in harsh light, making them ideal to shoot when the sun is higher in the sky.
However, older buildings deserve a little more respect. Their façades reveal their history, and you should capture them in the best light to reflect this. Shoot in the early morning or the late afternoon when the light is warm, and use this ideal light to bring out the rich colour and texture of stonework. Make sure you keep the camera as straight as possible to avoid unnecessary distortion.
2. Focus on details
Fill a frame with strong lines and colour, like with this council building in Barnsley, South Yorkshire (Canon EOS 5D Mark II, 24mm, 1/180sec at f/5.6, ISO 800)
Changing from a wideangle lens to a telephoto means you can crop closer on your urban subjects and concentrate on the more intricate details in the view (below). Shooting abstracts is all about looking for shapes, patterns and colours within the scene. Look for areas of light and shade, diagonal lines and any reflections created by the abundance of glass used in a city. Don’t be afraid to tilt the camera if you need to, as it suits the details, and make the most of it.
3. Work into the dusk
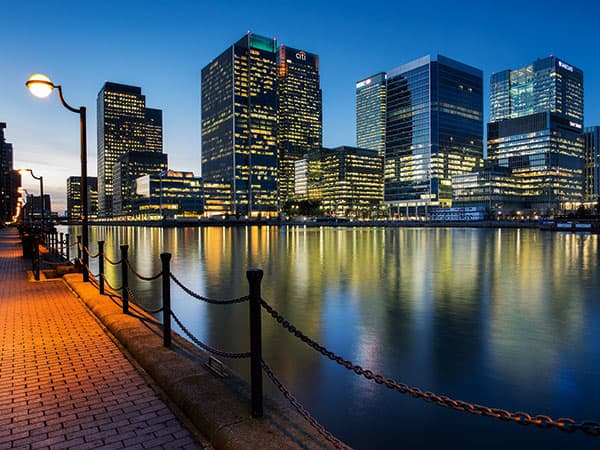
In this night image of London’s Canary Wharf, the lights give a new look (Olympus OM-D E-M1, 12mm, 8sec at f/8, ISO 200, tripod)
One great advantage of shooting in an urban environment is that you can continue with your work even when the sun has gone down. As day turns to night, your chosen location is lit by different light sources as the street lights and interior lights of buildings illuminate the environment. Grab a tripod, connect a cable to your camera and get set for some great new possibilities. Your exposures will run into seconds or even minutes, but in that time, all sorts of things can happen.
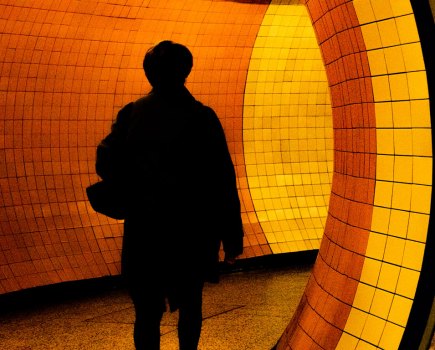
4. Shoot from low angles
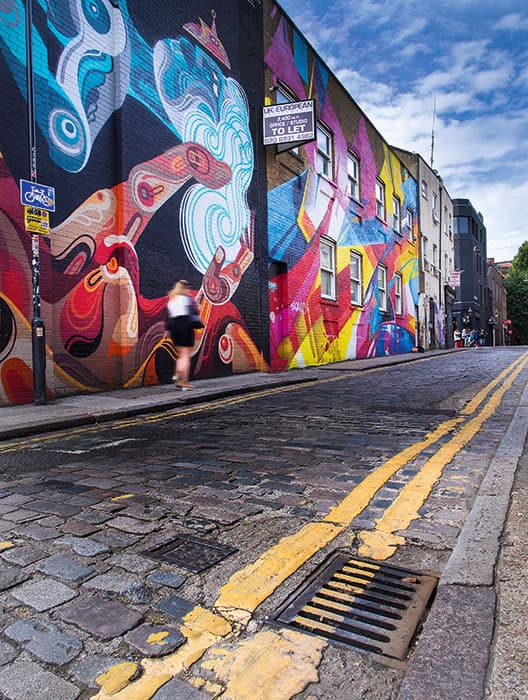
In this shot of Shoreditch, London, crouching down meant filling the foreground with features unique to the urban environment (Olympus Pen E-P5, 12mm, 1/125sec at f/8, ISO 200, 0.9 ND soft grad)
Like many photographers, I shoot most of my images from standing height, but there is a whole new perspective to be had by crouching down and shooting low down. Shooting from pavement level gives a worm’s-eye view of the world and it’s amazing how different things look from down there. Use a wideangle lens to make the most of these exciting new angles, filling the foreground with any interesting feature you can find.
Include drainage grating, cobbled streets, road markings, reflections in puddles after rain and even people’s legs to fill the foreground. Use a small aperture to make the most of depth of field, and focus around a third of the way into the view to maximise this.
Use a digital camera’s LCD screen to help frame your shots, or, if your camera has Wi-Fi, connect it to your smartphone and use this as your viewfinder.
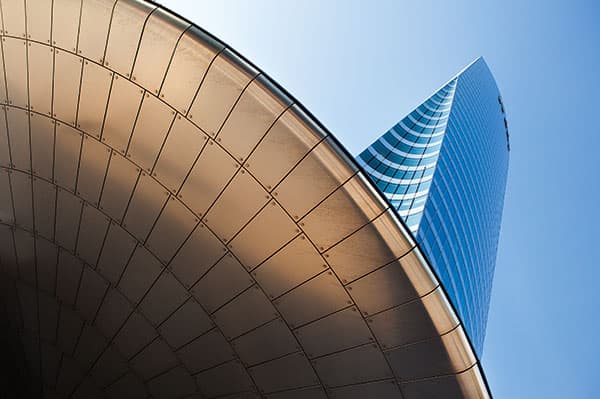
5. Fit a polariser
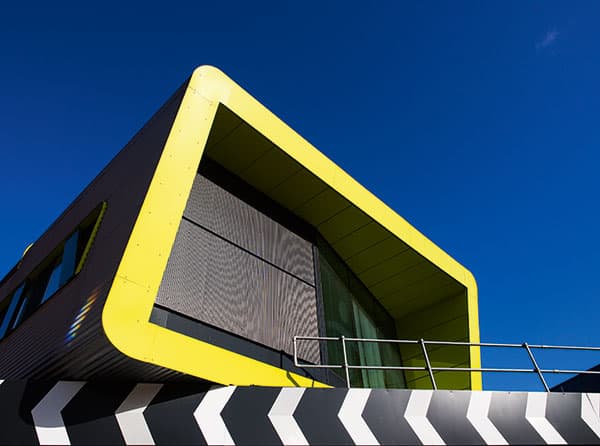
A polariser is a fantastic filter for adding impact to your shots. On a sunny day you can use one to deepen the blue of the sky, which will look great against the sleek lines of a modern building (below). Polarisers can also be used to reduce glare and reflections from any glass surface, again adding impact by increasing contrast. Remember, when enriching the sky polarisers only work at a 90° angle to the sun, but they work at most angles when reducing glare from windows.
6. Include people in the frame
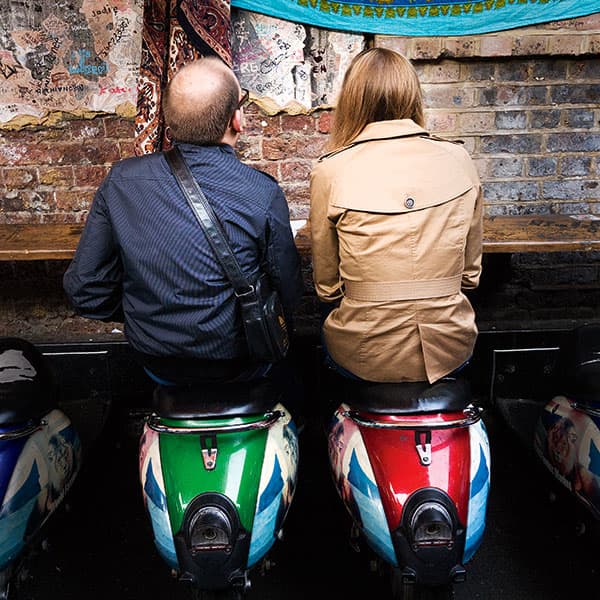
With many of your views you might prefer not to include people in your shots, but this is the time to embrace them as part of your composition. Just like traffic, they can provide an interesting addition when captured with a slower shutter speed, but you can also capture people in their own right (above). This takes a keen eye and perfect timing, but people make great subjects to shoot candidly. Preset your camera to capture those brief moments in time.
7. Convert to black & white
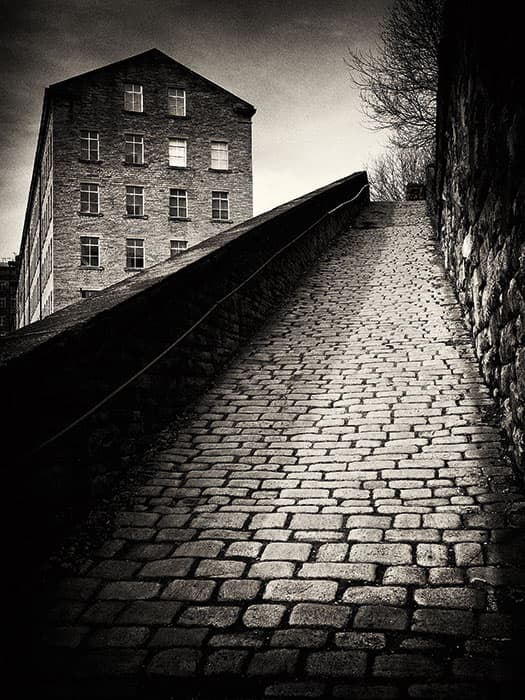
A less modern scene, like this street in Halifax, West Yorkshire, suits the black & white treatment (Olympus OM-D E-M5, 20mm, 1/60sec at f/8, ISO 200, 0.6 ND soft grad)
Shooting in black & white or converting on the computer adds a gritty feel to images, and reduces them to the elements of light and shade. Removing the colour focuses the eye more on the subject and can often tell a better story.
8. Deal with the jobsworths
One burden when shooting in an urban environment is dealing with exuberant security guards. However, if you are on public land (in other words, most streets), you are well within your rights to carry on shooting. So, be polite, stand your ground and explain that you are merely shooting for yourself and within the law of where you can point your camera. Many security guards are just interested in your intentions, but even if you are using a tripod you can still carry on shooting.
9. Introduce movement
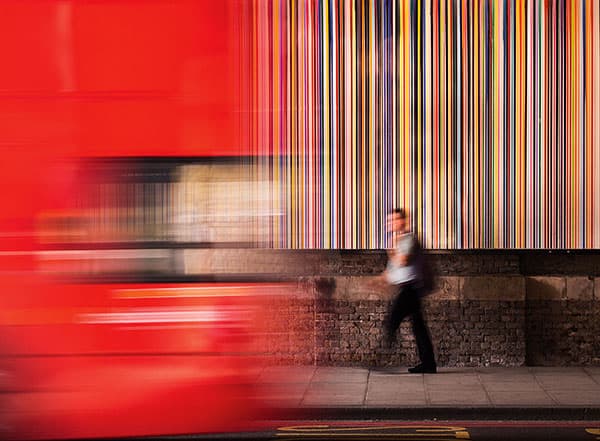
Use a tripod or your camera’s image stabilisation to introduce blur with a slow shutter speed (Olympus OM-D E-M5, 45mm, 1/10sec at f/5.6, ISO 200, 0.9 ND standard filter)
You can add impact and drama to your urban images by capturing movement. A slower shutter speed and some fast-moving traffic capture the business of a modern city, where everyone is rushing from A to B. A red bus, colourful taxi or even a splash of yellow from a construction truck will add movement and colour to your images, bringing them alive and really complementing the buildings in the background.
10. It’s not all about the outdoors
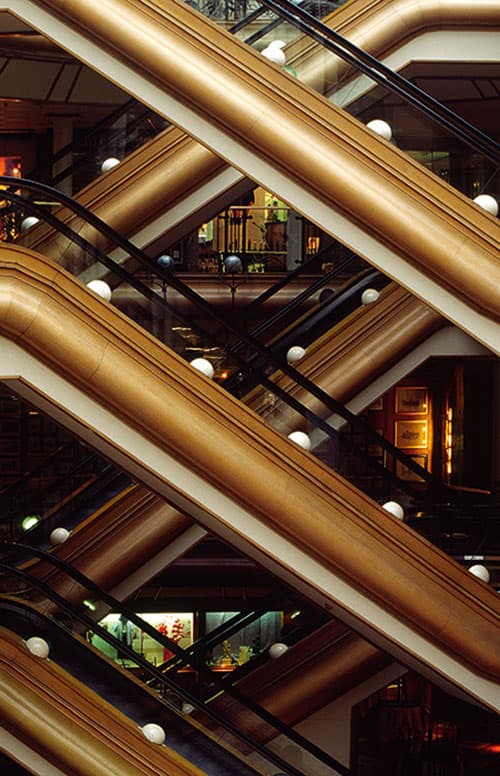
Inside this Glasgow shopping centre, the staircases and escalators make for interesting results (Canon T90, 50mm, 1/15sec at f/5.6, ISO 100)
If a sudden downpour catches you out, head inside and continue shooting. Whether it’s a museum or art gallery, shopping centre or even the local train station, there are often shots to be had. Increase sensitivity to ISO 800, change the white balance to match the lighting, and look for details and interesting features in this new unexpected location.
11. Close to home
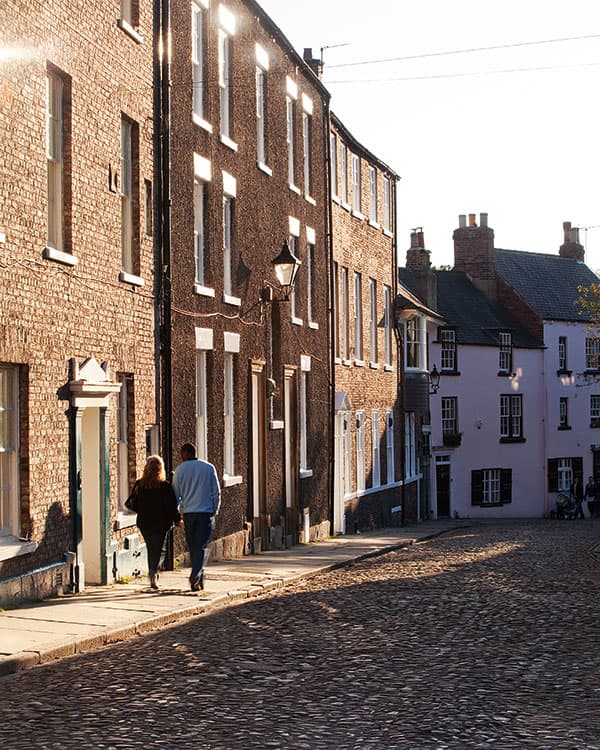
This simple Durham street offers exciting possibilities (Canon EOS 5D Mark II, 70-200mm at 70mm, 1/10sec at f/16, ISO 200, tripod)
Your own town is as good a location as any, although you often need to look at it with fresh eyes We can become so familiar with our own environment that we forget what there is to shoot. View it as a photographer rather than a resident, but use your local knowledge to get the best views. You’ll know how to access each location, where any roadworks are taking place and perhaps even where the sun illuminates a certain building at different times of the day. Even with this useful info, you’ll quickly realise how easily you missed some great photographic potential as you view the location with your photographer’s head on.
12. Take the high view
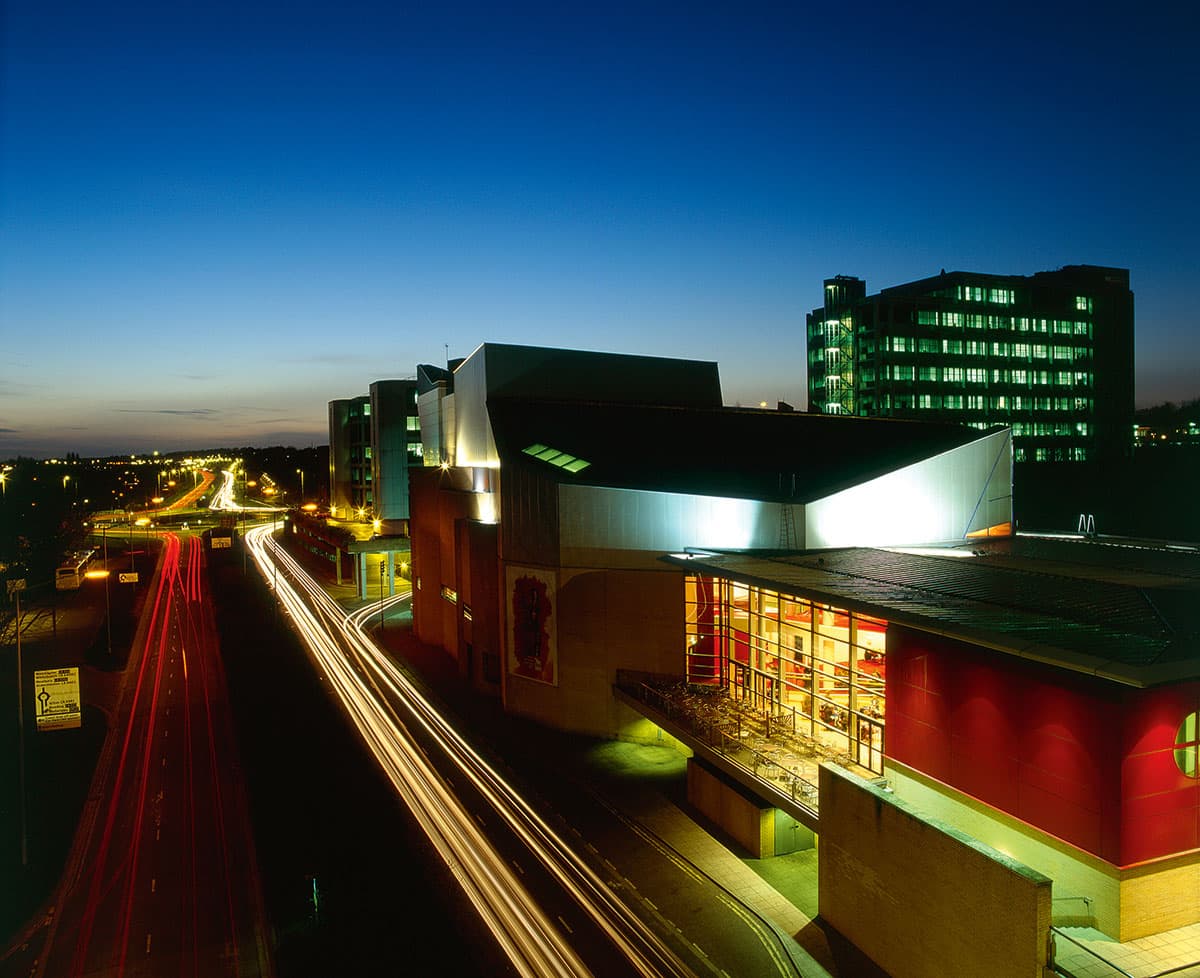
Look for elevated viewpoints for a new perspective, as with this shot of Basingstoke in Hampshire at night (Mamiya RZ67, 50mm, 15sec at f/16, ISO 50, tripod)
Another advantage of shooting in a town is that you can often get a higher viewpoint to capture another perspective. Whether it’s climbing a few stairs, getting the lift to the top of a building or even going to the top level of a car park, this new view will add to your portfolio of images and capture the urban landscape from above. You can shoot wide for the full view, or zoom in on details with a telephoto, but both will give you interesting results.
13. Go long
The urban environment is a great place to try out extreme ND filters (Olympus OM-D E-M5, 20mm, 20sec at f/11, ISO 100, Big Stopper, tripod)
By using a tripod in the daytime, combined with an extreme ND filter, you can capture some dynamic and interesting results with a long exposure. With movement from clouds in the sky and any water interest that many cities have, you can blur these with an exposure of 1-3 minutes, and capture the contrast with the static subjects of the city. This is a particularly useful technique when the weather is overcast, and offers a different way of capturing your chosen city.
14. Research using Google Maps
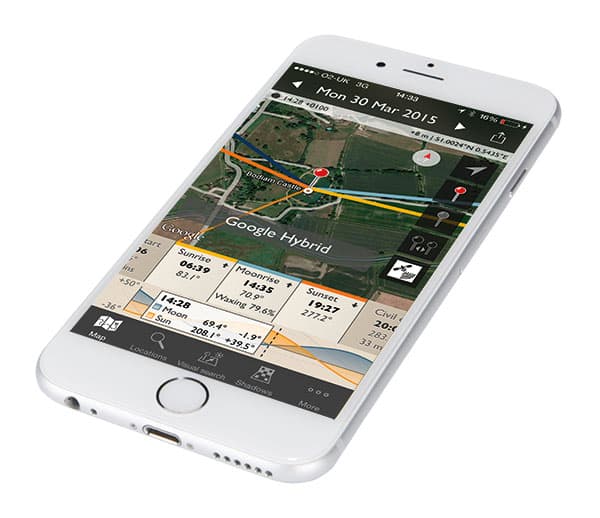
With any new location you visit, it’s worth doing a bit of forward planning to make the most of your day. Using websites such as Google Maps will help you identify possible locations, and you can even use Street View to see the exact location and spot to shoot from. The satellite view also gives you an idea of where the sun will be positioned throughout the day, although The Photographer’s Ephemeris app (www.photoephemeris.com) elaborates on this, marking the sun’s position on a map throughout the year.
15. Play it safe
This applies to where you stand, as well as shooting in an environment where there are other people around. You are working in a busy location so avoid getting in people’s way and, most of all, be aware of traffic all round you – don’t get run over! If shooting in off-street areas or at night, then keep your gear discreet, too. In these places, one camera and one lens is ideal as you don’t want to attract attention.
If you are nervous about shooting at night, take a friend or partner with you. Most locations are safe when there are other people around, but it always pays to be sensible.