When snow and ice hit this country, it’s seldom for very long – in fact, often, if you blink you’ll miss it. The problem with finding a suitable picture for a Christmas card, or in fulfilling a client’s request for a wintry scene, is that you really need to think about the subject and shoot it long before the pictures are required – usually in the middle of summer, when the budget will hardly fly you off to an Alpine glacier. All is not lost, though, as fortunately there’s a simple solution in the Photoshop Channels and Layers palettes.
To convert a summer picture to a winter scene and give it a chilly look is not a complicated procedure, but the secret to success lies in your choice of image. The technique can work extremely effectively with one scene, but have little visual impact on another. I had to experiment with a number of images before
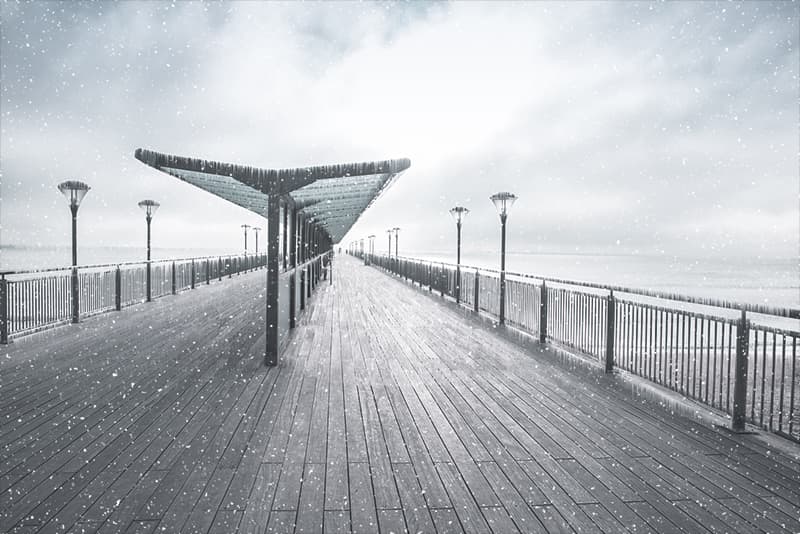
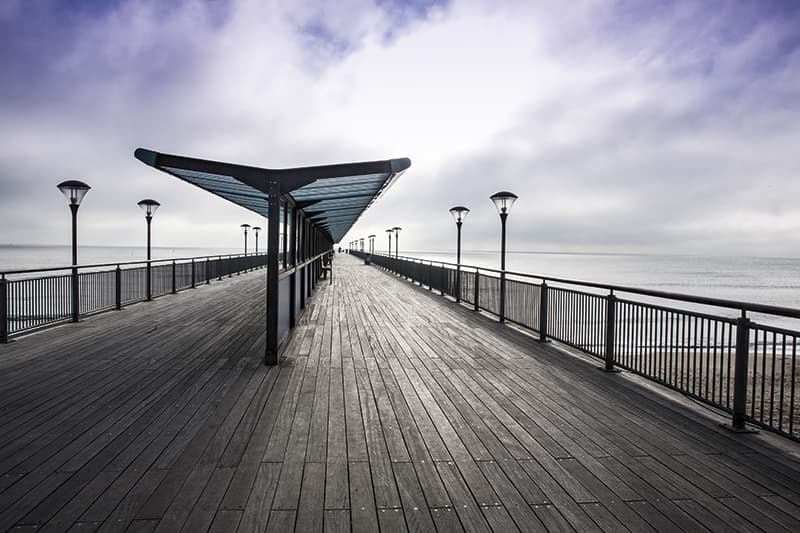
I found one that worked for me. I discovered that important criteria include features such as railings or tree branches, with highlight and shadow areas that show up the snow effect clearly. My image of Boscombe Pier in Dorset (featured) had the qualities I was looking for.
How to Create the effect
Software needed
To recreate this winter transformation, we’ve used Photoshop, but you should also be able to transfer these steps to follow the tutorial in Photoshop Elements and other image-editing programs to achieve a similar look to our version.
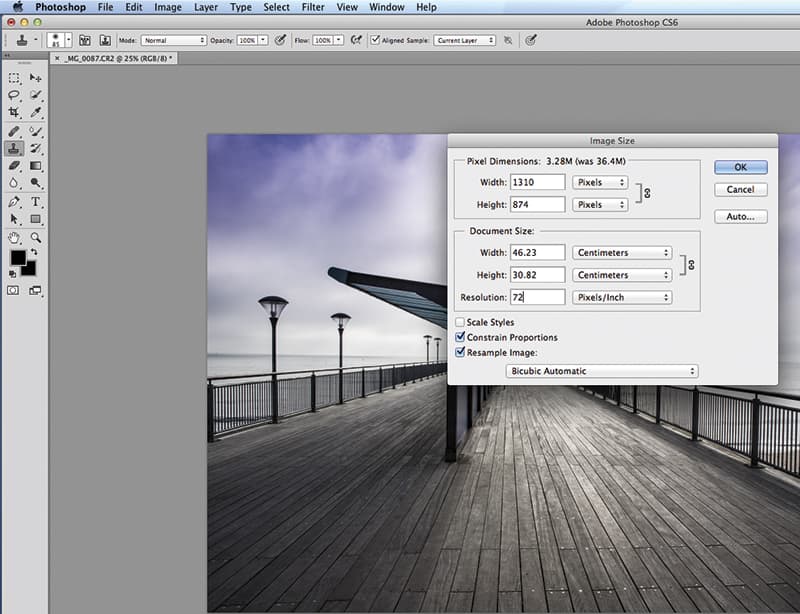
1. Resize image
Open your image and, in the Image<Image Size menu, change the resolution to 72ppi. Check the Constrain Proportions and Resample Image boxes. This stage is important for the snowflake size later. If the resolution is too fine, the snowflakes will appear too small.
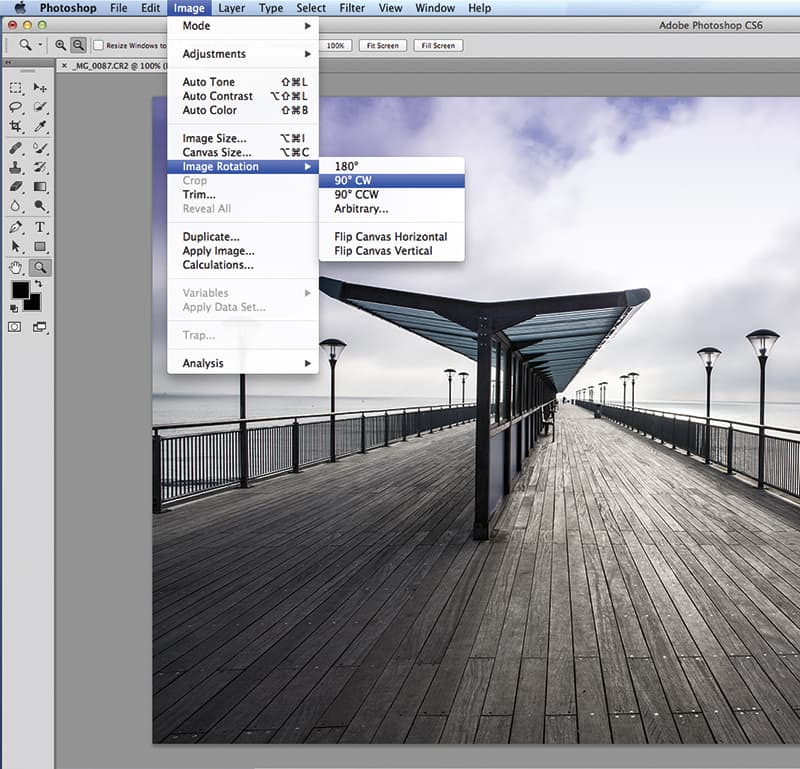
2. Rotate and select
In the Image>Image Rotation menu, rotate the image 90° clockwise (CW). With the Lasso tool, I made a rough selection of the sky and upper deck area, avoiding the foreground with the decking bolts and fixings, which don’t look good with the ice effect.
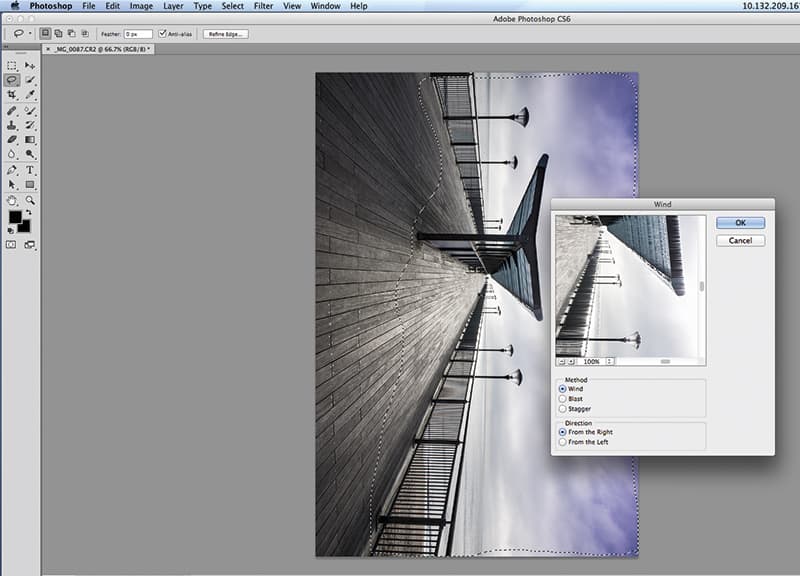
3. Add the icicle effect
Go to Filter>Stylize>Wind. Select Wind as your method and check direction From the right. Click ok and a fairly subtle ice effect is dragged down from the linear edges in the picture. Next, rotate the image back 90° CCW.
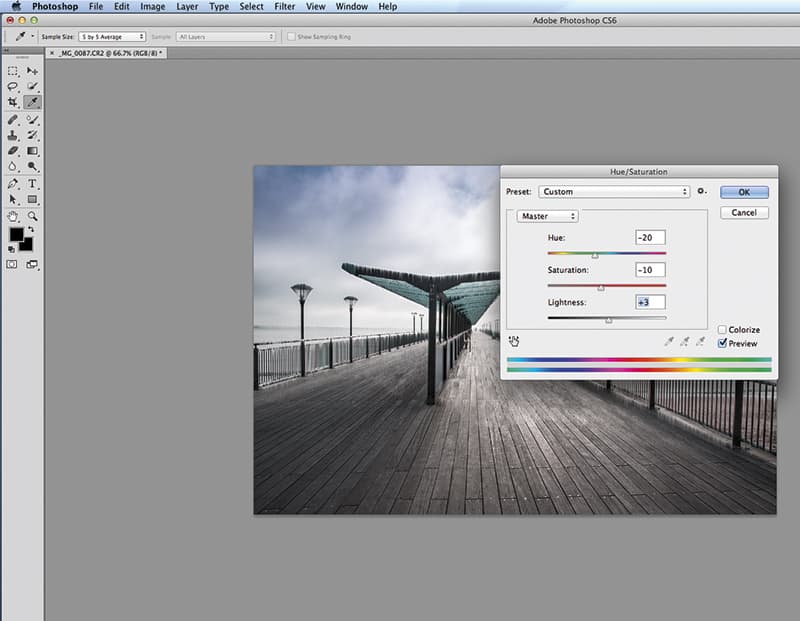
4. Adjust the Hue/Saturation
Pull up the Hue/Saturation palette from the Layers box and make adjustments to suit the wintry feel you are seeking to create. In this case, the settings are Hue -20, Saturation -10 and Lightness +3.
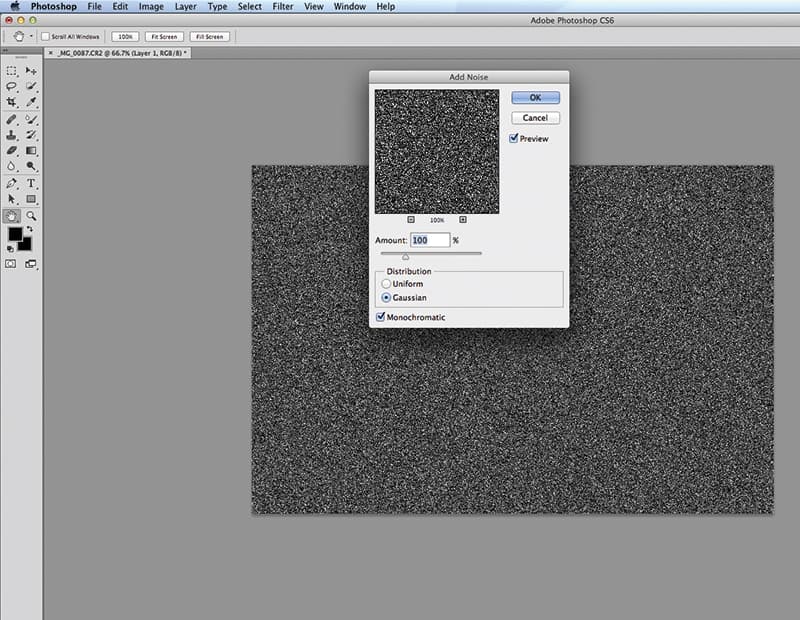
5. Create snow
Create a new layer and fill with black. In the Filter menu, select Noise>Add Noise, then select 100% Gaussian and check the Monochromatic box. Return to the Filter menu and select Blur>Gaussian Blur and set the Radius to 1.0 pixels.
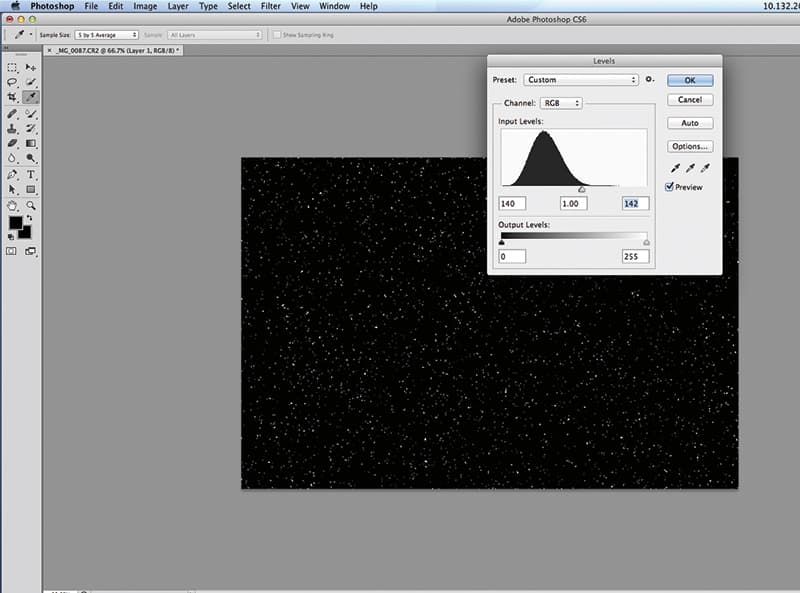
6. Size the snowflakes
Open the Levels window and set the Input Levels sliders to 140 lower and 142 higher. This creates an even distribution of snowflakes. Next, go to Filter>Blur>Gaussian Blur and set the Radius slider to 0.5 pixels.
7. Blend the snow
In the layers panel, change the Blending Mode to Screen.
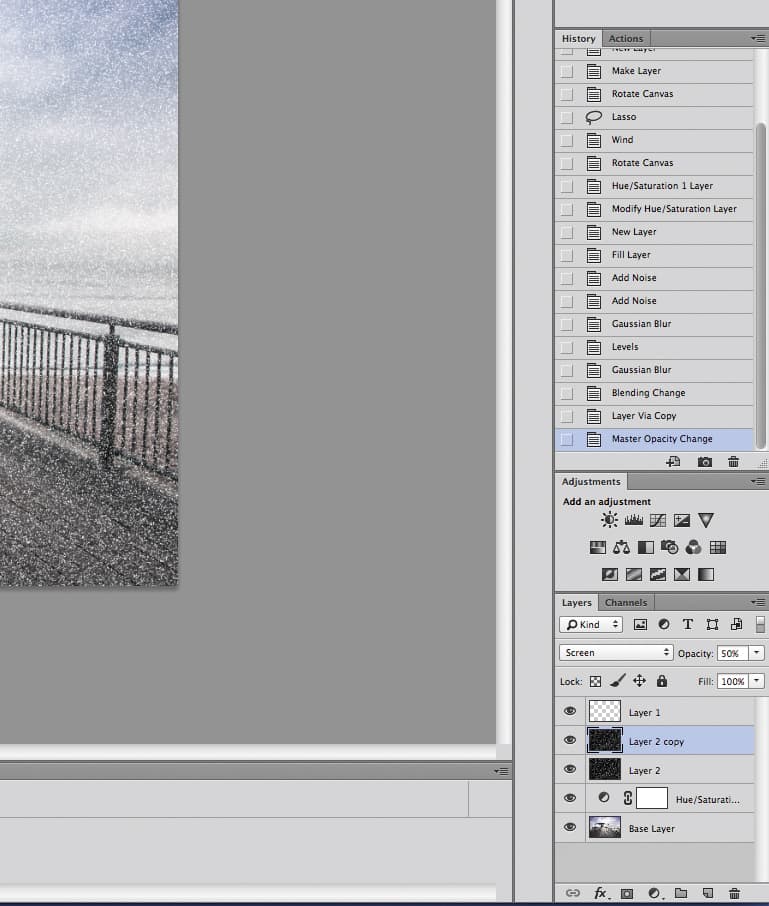
8. Increase the snow
To change the direction and intensity of the snow and add a little more, make a copy layer and go to Edit>Transform>Rotate 180°. Reduce the Opacity to 50% and winter is finally with us.
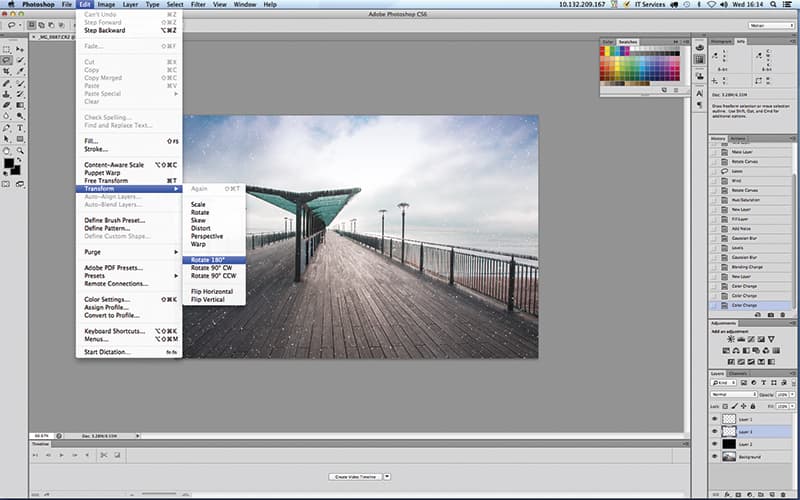
The finished product!