Shooting the moon is one of the most rewarding and accessible forms of night photography, especially if you are lucky enough to get a clear night sky to see a ‘supermoon’ – Andrew Fusek Peters helps you get ready for the next one
A supermoon occurs when a full moon or a new moon coincides with its closest approach to earth, resulting in a larger-than-usual apparent size. Photographing a supermoon requires careful study, planning your foreground, working with the weather and using the right kit – in this case, telephoto lenses (the longer the better) to bring the moon closer.
Whilst you don’t have too much time to prep for a giant moon, if you can’t get out with your kit, there’s always another time. Although a full moon occurs once in every lunar cycle (29.5 days), a supermoon happens three or for times a year and it’s a real treat to capture this awe-inspiring phenomenon. We’ll show you how to capture it in all its glory in this in-depth guide on how to photograph the moon.
When’s the next Supermoon and why does it happen?
There are 12 full moon names that correspond to the full Moon in each month. However, because our modern calendar doesn’t quite tally up with the Moon’s phases, we sometimes get more than one full moon in a month – this is known as a Blue Moon.
The full list of annual full moons are:
- 6 January 23 – Wolf Moon (also known as Old Moon or Ice Moon)
- 5 February 23 – Snow Moon (also known as a Storm Moon or Hunger Moon)
- 7 March 23 – Worm Moon (also known as a Chaste Moon, Death Moon, Crust Moon or Sap Moon)
- 6 April 23 – Pink Moon (also known as a Sprouting Grass Moon, Egg Moon or Fish Moon)
- 5 May 23 – Flower Moon (also known as a Hare Moon, Corn Planting Moon or Milk Moon)
- 4 June 23 – Strawberry Moon (also known as Rose Moon or Hot Moon)
- 3 July 23 – Buck Moon (also known as a Hay Moon)
- 1 August 23 – Sturgeon Moon (also known as a Green Corn Moon, Grain Moon or Red Moon)
- 31 August 23- Blue Moon – The second full moon in the month, and a supermoon
- 29 September 23 – Full Corn / Harvest Moon (also known as the Barley Moon)
- 28 October 23 – Hunter’s Moon (also known as a Travel Moon or Dying Grass Moon)
- 27 November 23 – Beaver Moon (also known as the Frost Moon)
- 27 December 23 – Cold Moon (also known as the Long Night Moon and Oak Moon)
A Super Moon is when a full Moon occurs whilst it’s at the closest point to Earth during its orbit. It’s much larger and brighter than the Moon on any other night. The next Super Moon will happen on 1 August. Stargazers and astrophotographers are in for a treat though, and there will be another supermoon shortly after on 31 August 2023.
So when can you see it? It will be visible from various locations throughout the world, clear skies permitting. Those in the US and the UK will be able to see the first one, known as the Sturgeon moon, starting from 2:32pm EDT and 7:31pm BST. Though the Super Moon starts at 7:31pm, it is worth noting that moonrise in the UK isn’t until after 9pm. The full moon will be visible for approximately three days until Thursday. There will be another supermoon on 31 August.
What is a Harvest Moon?
The Harvest Moon is always the nearest full moon to the autumnal equinox. It’s given this name as it historically helped farmers work late into the night, giving them more time to bring in crops from their fields. The Harvest Moon doesn’t have a fixed date every year, but it usually falls in September.
What is a Blood Moon?
A Blood moon is a rare event when a lunar eclipse occurs on the same night as a Supermoon. The next Blood Moon won’t be until 2025, unfortunately.
How to photograph the moon
Now you know all the different moon phases, in this article we show you how to get the best out of them and produce some incredible photos.
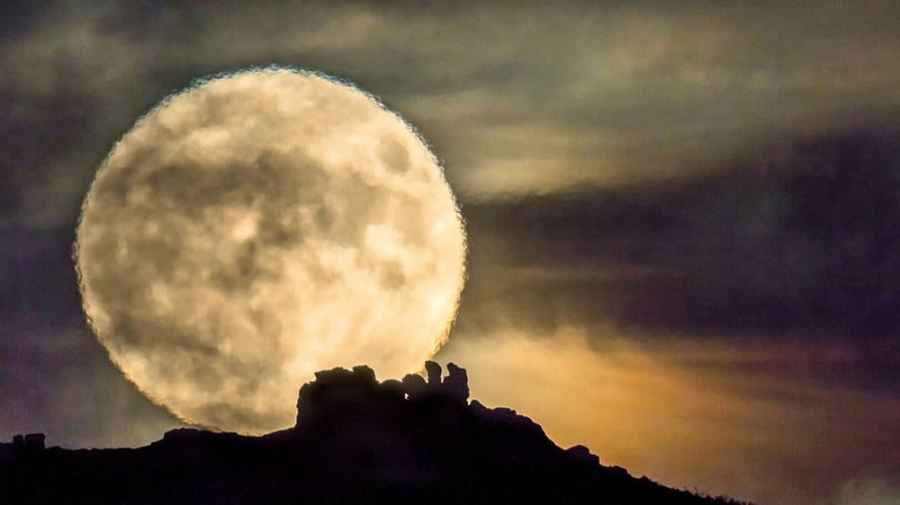
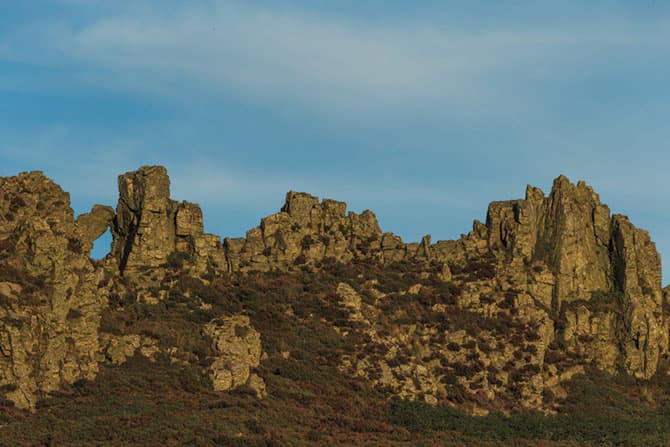
The key for a great lunar photo is to anchor the moon in the foreground. Pictures of the moon alone are fine, but it is far more interesting to place it in context – to tell a story that has foreground detail.
Supermoon rising over Three Fingers Rock, Caer Caradoc. Canon EOS 7D Mark II, 500mm +2x III, 1/60sec at f/8, ISO 800. Credit: Andrew Fusek Peters
Framing with the moon
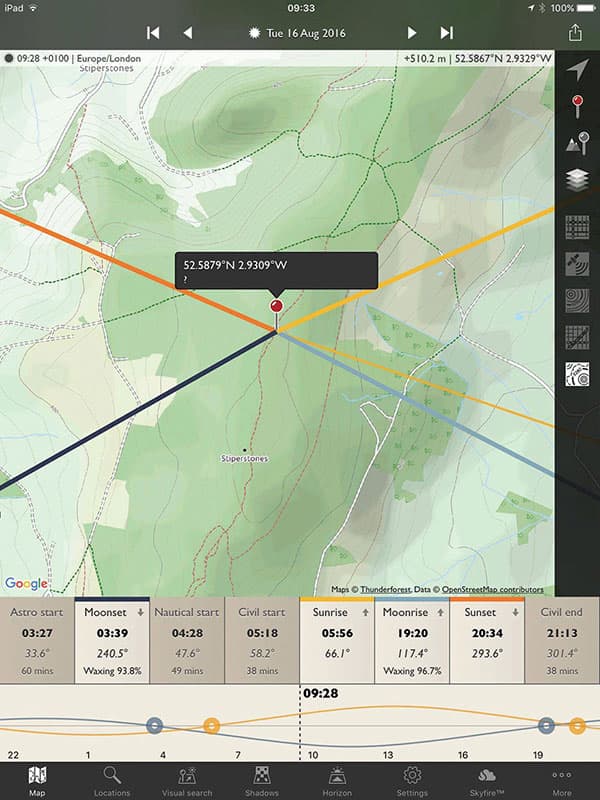
First, you have to decide what sort of image you want. Do you want a city shot, with buildings as the backdrop, or is there a hill, rock formation, mountain, lake, lighthouse or industrial feature that could provide interest? Visualise the picture in your mind and imagine where you want the moon to be when it rises. Surprisingly, you have complete control over this, but you need a complicated tool called The Photographer’s Ephemeris to help with the framing.
The Photographer’s Ephemeris (photoephemeris.com) is an invaluable aid that takes an inspired idea and shows you how to make it possible. However, before you use it you need to understand about forced perspective and the illusion of distance available through long lenses.
If I wanted to photograph the moon rising over Ludlow Castle in Shropshire, for example, I would need to be some distance away in order to fit both the moon and the castle walls into the frame. The Photographer’s Ephemeris shows me that the moon would rise southeast over the castle walls and that I would need to be on a northwest line to catch it rising.
There are two important tips to remember. First, any full moon/supermoon will rise on or after sunset, so you will mainly be photographing a silhouette to keep the moon detail. However, one or two days before the full moon, it will still look full but it will rise earlier, so you have a chance of evening light and moon at the same time. Don’t try a shot that has been done thousands of times before. I had never seen a photograph of the moon rising over Ludlow Castle, so I wanted to create something fresh.
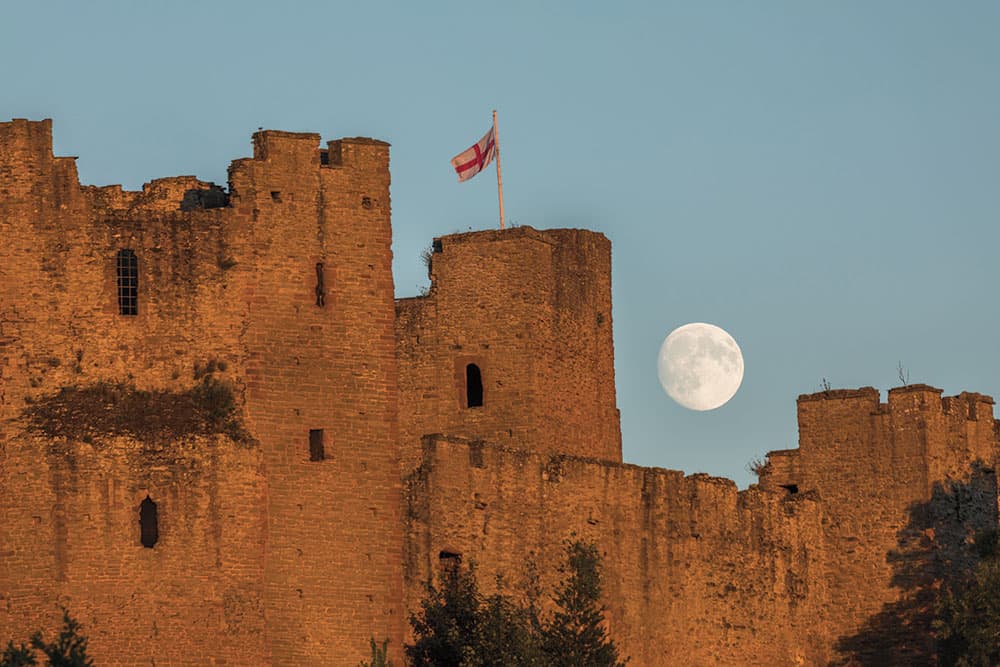
Moon rise over Ludlow Castle Canon EOS 5D Mark IV, 100-400mm +1.4x III, 1/250sec at f/8, ISO 320. Credit: Andrew Fusek Peters
Getting some perspective on the moon
This picture was taken handheld with my Canon 100-400mm lens (see our guide to the best Canon EF lenses) and illustrates what forced perspective can do. It brings the moon closer and creates wonder from a single raw file containing all the dynamic range I needed. The supermoon is a challenge that requires even further reach. Remember that when the moon is above the horizon, there is more of the earth’s atmosphere between your lens and the moon. This is why the moon often looks blurry or distorted. As it rises, there is less atmosphere and the moon appears sharper.
To take advantage of the coming supermoon, use a 150-600mm on an APS-C DSLR body, or even a big prime lens with a single/double extender. With your weather app and The Photographer’s Ephemeris, you should be in the right spot at least an hour before moonrise.
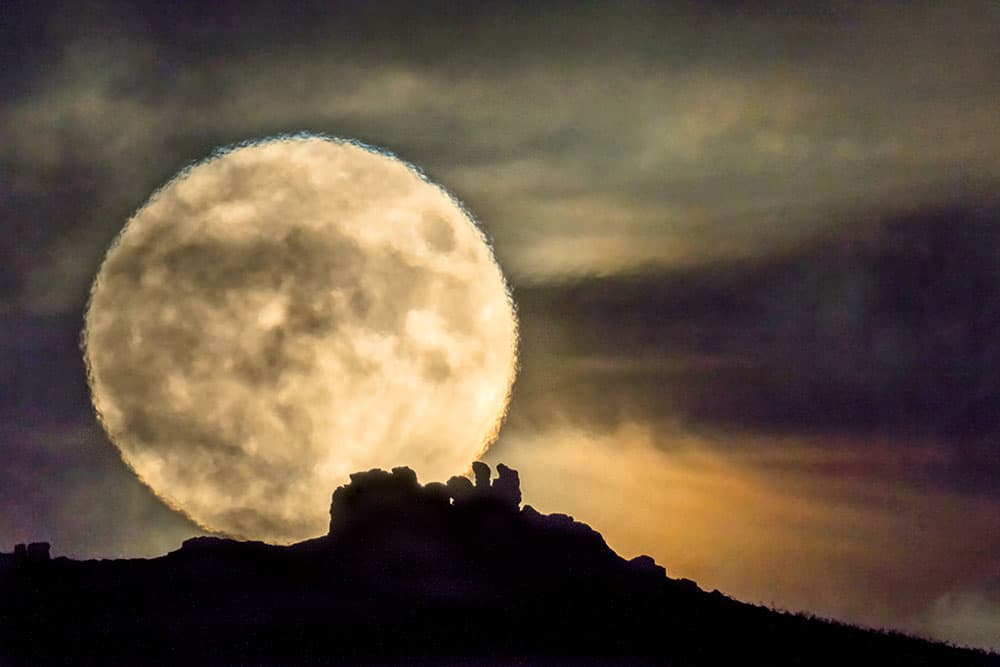
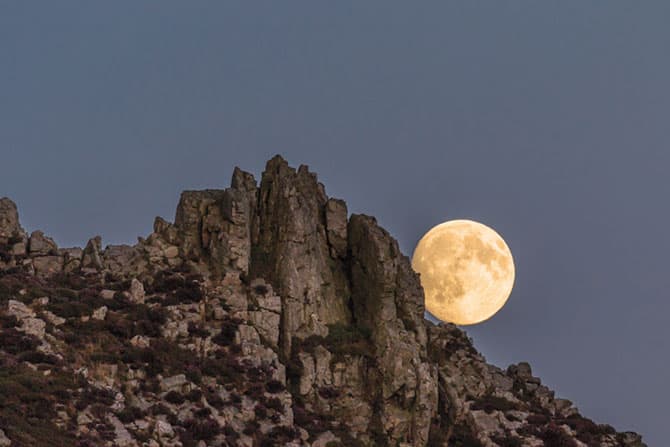
Test shots show how the foreground will sit in the lower part of your picture. Be prepared to move quickly if the moon does not rise in exactly the right place. If it is partly cloudy, don’t give up. Last year’s supermoon was a washout, but as I was driving home, suddenly the clouds cleared. I ran over the road, threw my Canon EOS 7D Mark II (see our guide to the best Canon DSLRs), double extender and 500mm lens (giving me 1600mm of reach) onto a hedge, which acted as a tripod, and as the moon was briefly clear, saw it cut out of Three Fingers Rock on Caer Caradoc in Shropshire.
Moving the focus point allowed me to place the moon on a two-thirds line, as per the rule of thirds, and the next day it was on the front of The Times.
Finally, once the moon appears, expose for it rather than the landscape. Remember, your final goal is to make the supermoon an element of beautiful landscape photography or an urban story.
How to photograph the supermoon
1. Planning
Use The Photographer’s Ephemeris (TPE) to plan your shoot. Choose an interesting foreground, such as a rock, mountain, castle or hill. If you shoot from below that point, the moon will rise later over your foreground. TPE is worth a careful study as planning is vital.
2. Weather
Trust your weather app. Cloudy skies are the enemy of a good moon shoot. I have waited on distant hillsides praying for the clouds to clear over the Stiperstones in Shropshire where the moon has eluded me. For the best results, you will need a completely clear evening.
3. Preparation
Get on-site in plenty of time. If you are trying to put the two elements of moon and foreground together, practise framing the shot. You can go handheld or use a tripod. I do both. Handheld means you can move faster once the moon has begun to rise.
Credit: Andrew Fusek Peters
4. Focusing
Once the moon begins to edge over the horizon, ensure your focus point is spot on. If you are some distance from the foreground, focus on it and the moon will still be quite sharp. Check your histogram – do not blow out the moon. Shadow detail can be recovered later, but a blown-out moon is unusable.
Credit: Andrew Fusek Peters
5. Framing
You still have time to place the supermoon exactly where you want it by running very fast! I am always interested in effects, such as a rock feature gouging out part of the moon. You are literally framing on the fly and I found the fiddliness of TPS has to be countered with what you are actually seeing.
Credit: Andrew Fusek Peters
6. Raw quality
It is vital you shoot in raw. You’ll need to reduce the highlights/whites to add detail back into the moon and increase shadow detail to register the foreground – unless you are going for a silhouette effect, in which case, take down the blacks.
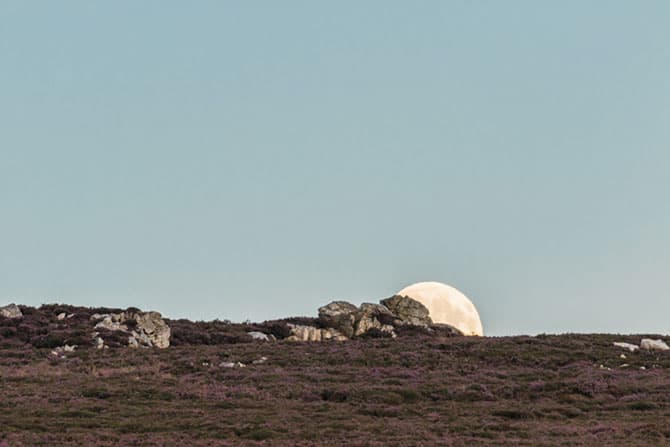
7. Give it a wide berth
An alternative approach is to put the moon into a landscape context, which means ignoring everything I have written previously! The brightness of a full moon transforms hill and vale. It adds an unearthly glow that lights water, trees and grass. With this technique, a blown-out moon does not detract at all from the final frame.
If you go wide, using a 14mm prime lens or a 16-35mm zoom, you have the chance to make the moon a small part of a larger picture. This technique requires a tripod, a remote release and manually focusing about a third of the way into the scene. Shoot wide open at f/2.8 or f/4 and, with a very low ISO, try different exposure times to give you detail in the land. A long exposure will blow the highlights in the moon, but reducing them in post-production should tone down the effect.
Alternatively, you could try a composite so you have the moon in detail as well, but the results often look artificial. This picture, taken at a bog pool on the Long Mynd plateau in Shopshire, managed to capture both the moon’s reflection and the oddly coloured nacreous cloud like a mini rainbow.
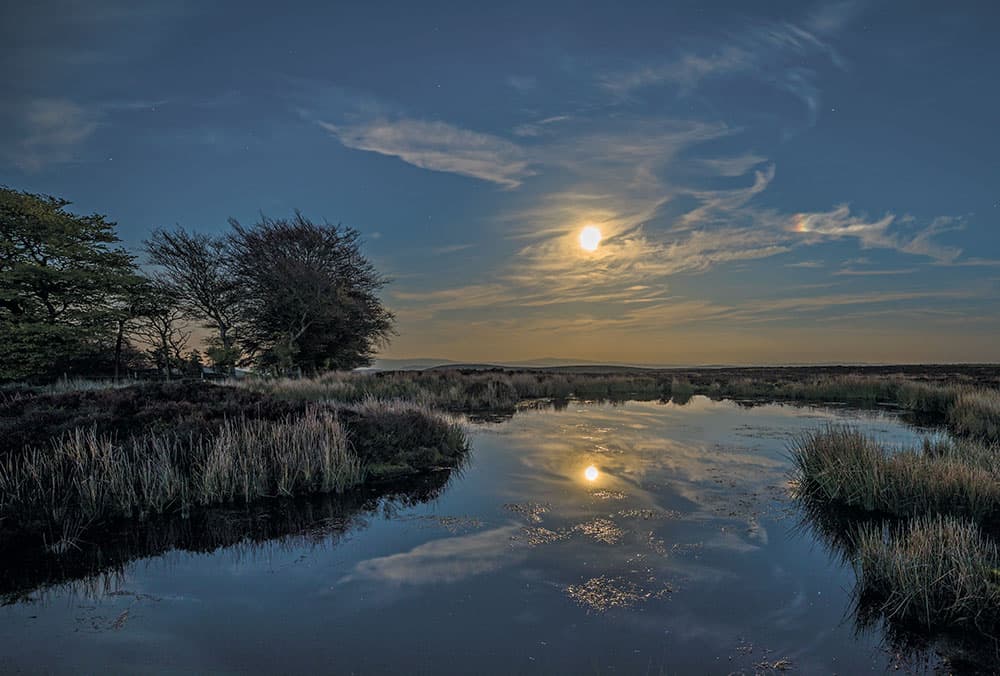
Credit: Andrew Fusek Peters
Kit list for photographing the moon
Long lens
A long lens is an absolute must for this type of shooting to bring the moon closer – anything 300mm and above will give the moon prominence. This is where APS-C or Micro Four Thirds (see our guide to the best Micro Four Thirds lenses) come in useful.
PhotoPills
This is an app I cannot do without, as it helps me not only with moonrise times but also planning Milky Way/star-trail shoots. Visit photopills.com.
Warm clothes
It’s chilly work waiting for the moon at this time of year, so wear plenty of warm layers and photo gloves. I love my MacWet gloves as my fingers get very cold.
Raw-processing software
The moon is incredibly bright, and processing your files to bring back detail from the highlights and bring up shadows are the last touches for a perfect supermoon photo.
 Andrew Fusek Peters is a conservation photographer and nature writer. He is currently on commission for the National Trust and Natural England on Shropshire’s uplands. His books include Wilderland, Upland and the National Trust guidebook for the Long Mynd. Visit www.andrewfusekpeters.com.
Further reading
- The best cameras for astrophotography
- How to photograph stars and the milky way
- How to use manual focus


